A Short Project !!
Well now where to start this tale?
Get yerself a cuppa and we will start
Short prologue
First things first a big thanks to the following people on the Forum (S) for the advice and help as the project progressed.
Names >>Paul_G, SOLAR, Clinker, Somethingfishy, & Blueskip..
Names >>JPM, Salamis, Dee Gee & Rus “T” Hinge ( The Sage )..
With the downturn in the economy ( Rep of Ireland ) I have far to much time on my hands, one can only go fishing so many days of the week,
( duck to avoid the missiles)
So looking at the UK I found myself heading over for an interview down Essex way meantime I picked up a project boat & trailer in the same general area ?
Littlehamton for the boat & Canterbury for the trailer “whew” over 1500miles that trip, and I forgot just how wet the UK can be, no joy on the other front >>ahhh well??
Now to the project>>
Got every thing home safely, & started to strip it down.
First to get it off the trailer no problem there,
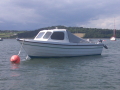
Then to have a good look at it It is a Mayland Fisherman 16 very rare model this!! looks better in the photo's, so got stuck in to the tear-down anybody watch overhauling on sky ?? that gives you a idea.
This is the point where the numtie introduces himself to the forum (s) & starts asking all the daft questions.
Well we get a good look at the hull the barnacle farm must have added about 10kg to the weight so with every thing off, the shell did not look to bad,
( Rose tinted glasses springs to mind )
Step 1 Remove all fittings that had not rusted to nought.
Step 2 Remove the crap & anti foul from the hull, this was a nightmare had to make up a 2 handed scraper for that spent over a week on my back sore head, arms and bum, this was about 0.5 mill thick, may not sound a lot I know how many bags I filled with the scrapings.
Step 3 Remove paint from top cabin & deck area this I tackled with paint stripper
( I know see the hands raised in HORROR nienie worri nie
got the right one for the job, still took me at least a week to 10 days to remove everything,
Step 4 Remove all fittings boards etch from inside cabin.
Step 5 Clean inside cabin? boy did I come undone with this bloody nightmare 2 weeks to get a glimpse of what the inside looked like that hurt...
Step 6 start sanding every thing guess how many meters of sandpaper I used ?
Just so you know this was completed BY HAND ( am I stupid or what )???
Now step 7 ( Remove rose tinted glasses ) wash & wipe down stand back and admire the handy work>> yer right !!
Under the anti foul I found extensive damage to first plank port & Starboard sides ( See slide show )
This was chipped out using a centre punch to remove ALL loose and damaged gellcoat removed.
again clean every thing & inspect then go round again and again in-case I missed a bit. ( thanks Linda )
Now decision time as to move the repairs along>>
Job list
Bill of materials list
Labour resources available
Time frame
Flow chart
Last but not least finances, anybody tell me the acronym for B.O.A.T.
You can tell I was a project fundie in another life.
I have attached the first slide show enjoy.
http://s766.photobucket.com/albums/xx30 ... t%20Start/
If you wish to read more or make a comment on this project drop in a post
Till next instalment
Cheers
George M
A.K.A. ??
A Short Story so far
Moderators: JimC, jw
-
PaPaSmurf
- SAI Bait Ball
- Posts: 53
- Joined: Sat May 08, 2010 10:03 am
- Favourite Rod: Any that are in the water
- Favourite Reel: One that works
- Favourite Fish: One I can eat
- Location: Waterford City
-
wilky83

- SAI Sea Dog!
- Posts: 446
- Joined: Wed Oct 15, 2008 11:41 pm
- Location: Austria
Re: A Short Story so far
Good post and an interesting job, just think how amazing you'll feel when its done and your out on the open ocean 
IBPAG No: 248
"A fish is too valuable to only catch once"
"A fish is too valuable to only catch once"
-
twinkle

- SAI Megalodon!
- Posts: 1490
- Joined: Sat Mar 28, 2009 5:07 pm
- Has thanked: 115 times
- Been thanked: 136 times
Re: A Short Story so far
my god you killed a perfectly good mussel farm when you cleared the hull of that boat  you should have started with something bigger my first project was a 40 ft half decker all timber. blow torches and scrapers for weeks on end caulking and filling for months. this was great training anything after it was a piece of p--s .when all the work is done and its looking like brand new. you go fishing a few times in it .you will see something else and bang your hooked.boat will be for sale on donedeal and a new project will be whelled in to place
-
PaPaSmurf
- SAI Bait Ball
- Posts: 53
- Joined: Sat May 08, 2010 10:03 am
- Favourite Rod: Any that are in the water
- Favourite Reel: One that works
- Favourite Fish: One I can eat
- Location: Waterford City
Re: A Short Story so far
Hi Twinkle
Don'T tell her in doors I have started negotiations for the next project ( Idle hands an all that ) hope to have it by sept or so

 bigger boat, my problem is the space at the house I don't have any you can see that the Mayland is parked on her side lawn & I get MAJOR earache already for the state of the place.
Will be posting up the rest of the rebuild repairs,painting, & refit as well as the trailer & O.B 
Watch this space
Cheers
George M
A.K.A. Basket Case
Don'T tell her in doors
Will be posting up the rest of the rebuild repairs,painting, & refit as well as the trailer & O.B
Watch this space
Cheers
George M
A.K.A. Basket Case
-
JimC

- Moderator
- Posts: 3084
- Joined: Wed Jan 29, 2003 5:18 pm
- Location: Cork
- Has thanked: 223 times
- Been thanked: 889 times
Re: A Short Story so far
Well Done George! A fine project!
There's always some job to be done to the boat - new or old!
There's always some job to be done to the boat - new or old!
-
twinkle
- SAI Megalodon!
- Posts: 1490
- Joined: Sat Mar 28, 2009 5:07 pm
- Has thanked: 115 times
- Been thanked: 136 times
Re: A Short Story so far
if your missus doesent know you by now george. she never will. take her out for a trip and convince her its too small for the family  she will help you with the second one
-
PaPaSmurf
- SAI Bait Ball
- Posts: 53
- Joined: Sat May 08, 2010 10:03 am
- Favourite Rod: Any that are in the water
- Favourite Reel: One that works
- Favourite Fish: One I can eat
- Location: Waterford City
Re: A Short Story so far
Her Right she knows me too well
The last time she was on a boat off South Africa it sank & the capt abandoned ship before us
This time I'm doing the steering not that makes it any safer
Cheers
George M
A.K.A. Basket Case
The last time she was on a boat off South Africa it sank
This time I'm doing the steering not that makes it any safer
Cheers
George M
A.K.A. Basket Case
-
PaPaSmurf
- SAI Bait Ball
- Posts: 53
- Joined: Sat May 08, 2010 10:03 am
- Favourite Rod: Any that are in the water
- Favourite Reel: One that works
- Favourite Fish: One I can eat
- Location: Waterford City
Re: A Short Story so far
Short Project Repairs Part II
2 Months Latter 
Hello again now that we have finished the strip down & identified the areas for repair we can now plan what is required next.
After removing the deck wear and grab rails I decided to only salvage what could safely be recycled
1 Grab rail
1 Fair lead &
2 Cleats
6 Bunk covers
The rest were binned, so onto the web to find new kit.
I used Google to start with then onto e-bay I am on a tight budget so spent many hours / days / weeks in some cases to find the right part at the right price ( * ) make sure you compare like with like, I made this mistake & now have some surplus. Kit.!!
List what you would like ( wish list ), then list what you really need ( (must have ), my contact list was grooooing daily so review who you keep in favourites as it can get crowded very quickly.
I set up a Boat Folder with everything in there>>
Boat file>then sub files for the different kit helps searching & reference check a lot easier.
Now material list for the hull repairs, after finding how Badly damaged the hull was I decided to repair it so out came the hammer ( Don't panic ) ! and a pin punch this was the only way I could tackle the barnacle rings, now using gentle taps I knocked out the affected areas you will see the extent in the slide show, I used a small dremmill grinder to clean out the remaining damage.
As I needed to trust the repair I went for belt & braces process Some would disagree with me on this method of repair ( Russ “T” Hinge ) had a different approach,
So ordered up fibreglass, resin gell coat & flow coat etc.
Step 1 Make sure all area's clean & roughened to take filler / faring mix
Step 2 Mix just enough to work in say 10 Min I started with a 50ml batch then as I got more confidence increased until I was using 250ml batch. Fill in 1st layer let it set rough sand to key then lay in next layer, continue until just proud of surface, I then let every thing cure for 24hrs ( it rained)
Step 3 Again clean out cracked & chipped surfaces on cabin & repeat process in steps 1 & 2
Step 4 Check stern gunnel's & transom for rot, cut back as required ready for fibreglass lay up.
Step 5 As you will see in the pics the condition of the cleats & cleat supports.
After all the inside of cabin cleaned, the glass fibre lay up over the old deck wear positions, this was done as the new kit positions were not identified so best to seal them & start anew.
Step ( X ) Am I boring you with all this Step business???
Step 6 Steering console, as I don't have room on the cabin
bin I decided to modify the original steering cowling, so make up subframe with some ply then glass & cut for switch panel see pics.
Step 7 Grab rails find timber, mark ready to profile cut then sand & shape as required, I made 3 small single rails for the starboard side it looks a bit lopsided but it works for me, I managed to salvage & repair 1 of the originals.
As I had them I cleaned down the bunk covers sanded & varnished them.
Step 8 Inspect rear keel area found some soft wood so out came the tools & glass fibre again, It pays to check, check ,then check again lol
Step 9 cut & fix on deck wear supports after measuring up with new kit placed as required.
See slide show
http://s766.photobucket.com/albums/xx30 ... %20Repair/
Step 10 Dig out the Outboard ready for its makeover.
Till next time
Thanks for reading
George M
A.K.A. Basket Case
2 Months Latter
Hello again now that we have finished the strip down & identified the areas for repair we can now plan what is required next.
After removing the deck wear and grab rails I decided to only salvage what could safely be recycled
1 Grab rail
1 Fair lead &
2 Cleats
6 Bunk covers
The rest were binned, so onto the web to find new kit.
I used Google to start with then onto e-bay I am on a tight budget so spent many hours / days / weeks in some cases to find the right part at the right price ( * ) make sure you compare like with like, I made this mistake & now have some surplus. Kit.!!
List what you would like ( wish list ), then list what you really need ( (must have ), my contact list was grooooing daily so review who you keep in favourites as it can get crowded very quickly.
I set up a Boat Folder with everything in there>>
Boat file>then sub files for the different kit helps searching & reference check a lot easier.
Now material list for the hull repairs, after finding how Badly damaged the hull was I decided to repair it so out came the hammer ( Don't panic ) ! and a pin punch this was the only way I could tackle the barnacle rings, now using gentle taps I knocked out the affected areas you will see the extent in the slide show, I used a small dremmill grinder to clean out the remaining damage.
As I needed to trust the repair I went for belt & braces process Some would disagree with me on this method of repair ( Russ “T” Hinge ) had a different approach,
So ordered up fibreglass, resin gell coat & flow coat etc.
Step 1 Make sure all area's clean & roughened to take filler / faring mix
Step 2 Mix just enough to work in say 10 Min I started with a 50ml batch then as I got more confidence increased until I was using 250ml batch. Fill in 1st layer let it set rough sand to key then lay in next layer, continue until just proud of surface, I then let every thing cure for 24hrs ( it rained)
Step 3 Again clean out cracked & chipped surfaces on cabin & repeat process in steps 1 & 2
Step 4 Check stern gunnel's & transom for rot, cut back as required ready for fibreglass lay up.
Step 5 As you will see in the pics the condition of the cleats & cleat supports.
After all the inside of cabin cleaned, the glass fibre lay up over the old deck wear positions, this was done as the new kit positions were not identified so best to seal them & start anew.
Step ( X ) Am I boring you with all this Step business???
Step 6 Steering console, as I don't have room on the cabin
bin I decided to modify the original steering cowling, so make up subframe with some ply then glass & cut for switch panel see pics.
Step 7 Grab rails find timber, mark ready to profile cut then sand & shape as required, I made 3 small single rails for the starboard side it looks a bit lopsided but it works for me, I managed to salvage & repair 1 of the originals.
As I had them I cleaned down the bunk covers sanded & varnished them.
Step 8 Inspect rear keel area found some soft wood so out came the tools & glass fibre again, It pays to check, check ,then check again lol
Step 9 cut & fix on deck wear supports after measuring up with new kit placed as required.
See slide show
http://s766.photobucket.com/albums/xx30 ... %20Repair/
Step 10 Dig out the Outboard ready for its makeover.
Till next time
Thanks for reading
George M
A.K.A. Basket Case
-
tedser
- SAI Lug Worm
- Posts: 19
- Joined: Thu Aug 05, 2010 12:29 am
Re: A Short Story so far
hi papa
sounds like a super project, im in the middle of my first one myself,would love to see your pics but it wont let me ,i dont know why,il pm you my e mail address and would apreciate if you could send me your pics they sound super
thanks tedser
sounds like a super project, im in the middle of my first one myself,would love to see your pics but it wont let me ,i dont know why,il pm you my e mail address and would apreciate if you could send me your pics they sound super
thanks tedser
-
PaPaSmurf
- SAI Bait Ball
- Posts: 53
- Joined: Sat May 08, 2010 10:03 am
- Favourite Rod: Any that are in the water
- Favourite Reel: One that works
- Favourite Fish: One I can eat
- Location: Waterford City
Re: A Short Story so far
Hi Tedser
Did some housework on my albums & the first 2 have been removed & will re instate them over the next few day


Cheers
George M
Did some housework on my albums & the first 2 have been removed & will re instate them over the next few day
Cheers
George M
-
PaPaSmurf
- SAI Bait Ball
- Posts: 53
- Joined: Sat May 08, 2010 10:03 am
- Favourite Rod: Any that are in the water
- Favourite Reel: One that works
- Favourite Fish: One I can eat
- Location: Waterford City
Re: A Short Story so far (All New Photos on last report )
Hi All
Iv been out of action the last few months,
Had a trip out with Dezzer on "Shock Wave" before the rosslare week, unfortunately for me I had an old ear problem come back on me which cut the day short. sorry mate!!
My ear problem is due to be repaired at some point in the future ??
Meantime I will keep working on the boat!!
I need to plan what is required next.
I decided to run the outboard refurbish along with the repaint as between coats there will be some idle time due to weather and other factors, so just to keep thing ticking over I got stuck into the engine.
Specks>> Evinrude long shaft 1971 ish
25hp / 22.0 cubic inch in old money,
2 stroke, 2 cylinder
Manual start
Her we go again!!
Big Note>>> IF IN DOUGHT R.T.F.M. ( )
1 Drop into test tank & run, check controls are working throttle, gear change starting, idling etc. (note setting for reference. )
2 Make notes and take pics if possible. Required for assembly.
Start removing power head components for clean & inspection,
Replace points
Check condensers I got a good belt so I know they work aooch,
N.B. A good sparky should be able to test them but for the
numty like me replace if suspect.
Strip & clean carb
Replace chock linkage my set were worn.
Strip & clean fuel air filter (s)
Replace fuel line
Clean & lube all linkage
Check kill switch this was replaced just in case !!
Note >>
unless you have access to a small lathe & can use it properly DO NOT try & polish needles & seats, if in dought replace them.
If you have a fuel tank its a good idea drain & flush this, you will be amassed with the crap & gum you get out, Don't forget the primer bulb and lines.
3 ?? Remove spark plugs Clean and / or replace as required, I did a pressure test on both cylinders & surprisingly they we OK between 4.5< 4.75 lbs, thermostat works OK to.
4 Removing the lower leg to get to the water pump was a pain in some cases the power head has to come off, I was very lucky it seems the impeller was replaced recently so a good flush was all I did to this, I got a good tell tail
Next reassemble clean & lubricate as required.
5 Paint the thing!!!
6 Re test time, I ran this in the test tank at idle for 10 Min then ran it up to ½ throttle in forward gear for an hour,changing the test tank water on permanent drain, this kept the test water cool, now and then I would wind it up to full throttle for a few Min & change gear
sounds soo sweet.
Happy Days !!!
See slides>>>
http://s766.photobucket.com/albums/x...0Start%202009/
http://s766.photobucket.com/albums/x...ect%20Repaint/
http://s766.photobucket.com/albums/x...ard%20rebuild/
Time to dig out the Trailer ready for its makeover.
Till next time
Thanks for reading
Safe Boating
-
Donnyboy1
- SAI Sea Dog!
- Posts: 481
- Joined: Thu Jul 02, 2009 5:33 pm
- Location: East Cork
- Has thanked: 37 times
- Been thanked: 65 times
Re: A Short Story so far (All New Photos on last report )
Links no worky papaPaPaSmurf wrote:Hi All
Iv been out of action the last few months,
Had a trip out with Dezzer on "Shock Wave" before the rosslare week, unfortunately for me I had an old ear problem come back on me which cut the day short. sorry mate!!
My ear problem is due to be repaired at some point in the future ??
Meantime I will keep working on the boat!!
I need to plan what is required next.
I decided to run the outboard refurbish along with the repaint as between coats there will be some idle time due to weather and other factors, so just to keep thing ticking over I got stuck into the engine.
Specks>> Evinrude long shaft 1971 ish
25hp / 22.0 cubic inch in old money,
2 stroke, 2 cylinder
Manual start
Her we go again!!
Big Note>>> IF IN DOUGHT R.T.F.M. ( )
1 Drop into test tank & run, check controls are working throttle, gear change starting, idling etc. (note setting for reference. )
2 Make notes and take pics if possible. Required for assembly.
Start removing power head components for clean & inspection,
Replace points
Check condensers I got a good belt so I know they work aooch,
N.B. A good sparky should be able to test them but for the
numty like me replace if suspect.
Strip & clean carb
Replace chock linkage my set were worn.
Strip & clean fuel air filter (s)
Replace fuel line
Clean & lube all linkage
Check kill switch this was replaced just in case !!
Note >>
unless you have access to a small lathe & can use it properly DO NOT try & polish needles & seats, if in dought replace them.
If you have a fuel tank its a good idea drain & flush this, you will be amassed with the crap & gum you get out, Don't forget the primer bulb and lines.
3 ?? Remove spark plugs Clean and / or replace as required, I did a pressure test on both cylinders & surprisingly they we OK between 4.5< 4.75 lbs, thermostat works OK to.
4 Removing the lower leg to get to the water pump was a pain in some cases the power head has to come off, I was very lucky it seems the impeller was replaced recently so a good flush was all I did to this, I got a good tell tail
Next reassemble clean & lubricate as required.
5 Paint the thing!!!
6 Re test time, I ran this in the test tank at idle for 10 Min then ran it up to ½ throttle in forward gear for an hour,changing the test tank water on permanent drain, this kept the test water cool, now and then I would wind it up to full throttle for a few Min & change gear
sounds soo sweet.
Happy Days !!!
See slides>>>
http://s766.photobucket.com/albums/x...0Start%202009/
http://s766.photobucket.com/albums/x...ect%20Repaint/
http://s766.photobucket.com/albums/x...ard%20rebuild/
Time to dig out the Trailer ready for its makeover.
Till next time
Thanks for reading
Safe Boating
-
PaPaSmurf
- SAI Bait Ball
- Posts: 53
- Joined: Sat May 08, 2010 10:03 am
- Favourite Rod: Any that are in the water
- Favourite Reel: One that works
- Favourite Fish: One I can eat
- Location: Waterford City
-
Donnyboy1
- SAI Sea Dog!
- Posts: 481
- Joined: Thu Jul 02, 2009 5:33 pm
- Location: East Cork
- Has thanked: 37 times
- Been thanked: 65 times
Re: A Short Story so far
Thats great, looking reaaaaaaaaaaaal sweet 
Glad the larch worked out, the outboard really came up nice with some new paint! Might try that myself!
Did you get by without redoing the transom?
Do you need a few something on the sides for fenders?
Glad the larch worked out, the outboard really came up nice with some new paint! Might try that myself!
Did you get by without redoing the transom?
Do you need a few something on the sides for fenders?
-
PaPaSmurf
- SAI Bait Ball
- Posts: 53
- Joined: Sat May 08, 2010 10:03 am
- Favourite Rod: Any that are in the water
- Favourite Reel: One that works
- Favourite Fish: One I can eat
- Location: Waterford City
Re: A Short Story so far
Yep transom is sound I had to replace the drain plug fitting so gave me a chance to inspect, the other bit,, if you check out the pics you will see under the stern ends both sides I have a layup of fibreglass right into the corners as a belt & braces repair just in case I win the lotto (?) & upgrade my O.B.
Quote>> [ Do you need a few something on the sides for fenders? ] dont think so the new larch strips seem pretty solid & I may lay in another strip below the top plank ?? dont like them balloon things
Still lots to do & finish yet so I'll just keep plodding at it.
Cheers
Quote>> [ Do you need a few something on the sides for fenders? ] dont think so the new larch strips seem pretty solid & I may lay in another strip below the top plank ?? dont like them balloon things
Still lots to do & finish yet so I'll just keep plodding at it.
Cheers
-
PaPaSmurf
- SAI Bait Ball
- Posts: 53
- Joined: Sat May 08, 2010 10:03 am
- Favourite Rod: Any that are in the water
- Favourite Reel: One that works
- Favourite Fish: One I can eat
- Location: Waterford City
Re: A Short Story so far
Hiya Twinkle
Know of any unfinished projects lying around always up for a challenge honestly still lots to do on this one, I was hopping to get it in the water this summer but time & money beat me  still there's time I hope before the winter to get the keel wet. Trailer & final fitting are in hand I need to post up the next bit of the rebuild.
Cheers
George M
Know of any unfinished projects lying around always up for a challenge
Cheers
George M
-
twinkle
- SAI Megalodon!
- Posts: 1490
- Joined: Sat Mar 28, 2009 5:07 pm
- Has thanked: 115 times
- Been thanked: 136 times
Re: A Short Story so far
thats the beauty of launch and retrive. you can go fishing anytime weather permitting. you should be about ready for the codling [lucky basket].where i have to take mine out off the moorings and read all about you guys pulling in codling to beat the band :lol:on the nice calm frosty evenings.ah well some guys have all the luck
-
PaPaSmurf
- SAI Bait Ball
- Posts: 53
- Joined: Sat May 08, 2010 10:03 am
- Favourite Rod: Any that are in the water
- Favourite Reel: One that works
- Favourite Fish: One I can eat
- Location: Waterford City
Re: A Short Story so far
Cheers
George M
-
PaPaSmurf
- SAI Bait Ball
- Posts: 53
- Joined: Sat May 08, 2010 10:03 am
- Favourite Rod: Any that are in the water
- Favourite Reel: One that works
- Favourite Fish: One I can eat
- Location: Waterford City
Re: A Short Story so far
Hello again been out of the project for a while, so time to update
Now that we have finished most of the boat repairs, the trailer is next.
NOTE >>> If you are not a proficient welder with a good grasp of materials & weld techniques then do not attempt the D.I.Y. Route get it done professionally.......
Because this trailer was not built for the boat going onto it, there is quite a large amount of modifications required..
Now the original set up had forward bunk rollers & rear beds, this is a pain to work with & instead of only getting wet up to my knees I was getting soaked up to my chin in some cases Brrrrrrrr.
As you will see in the slide show it is a pretty solid unit, heavy gauge galvanised material so will allow for some big solid welds.
I have this stripped down as follows>>
Removed the draw bar and winch assembly it will be rebuild at a later stage.
Using a length of timber to simulate my keel, check my roller positions, they will be repositioned as required latter.
Next I remove the main carrier frame, then came the bunk roller frame, this left the main axle & wheels, ready for cleaning before cutting & welding.
The Mayland stern keel cuts back the last 500mm from the stern and this can cause some stress with main & auxiliary outboards on the transom when transporting, to assist with support at this point I ordering some new bits from ?-bay
I have fabricated an adjustable rear roller assembly,this will drop down into position for launch & retrieval then lift for transport.
I then fabricated some extensions for the rear hull roller supports, I added 4 new rollers at the rear of the trailer frame. After messing about with getting the balance point identified & keel rollers positions I added one more roller at the bow end of the trailer.
On stripping down the suspension arms & hubs cleaning and repairs as required, fitting new bearings and reassemble back onto the old sub frame ( I intend to replace this axle sub assembly in the future as the old one is way over speck for my boat rated 1500kg )
Axle sub frame mounted and positioned for my nose weight 56 < 72kg me thinks ??
Next came the draw bar & winch post, if you can recall this was lopsided, and the clamp mounts were I think a bit lite for the job, sooo the tools are in action again to manufacture a new set up.
Last part was the adjustable light board bracket, nice new one fitted.
After this it was rub down & 5/6 coats of anti rust paint onto the trailer.
Now the modified trailer is ready to go onto assembly blocks under the boat.
Now she sits properly on all keel and bunk rollers.
This trailer supports the full keel length of my boat, with no overhang.
The new set up is more like the thing, now all it needs for the new weldy bits, is some nice new plastic end caps to seal the tubing, & its job done !!!!
Happy Days !!!
Slide show here
http://s766.photobucket.com/albums/x...ler%20rebuild/
Till next time
Thanks for reading
__________________