Wed Feb 06, 2008 8:38 pm
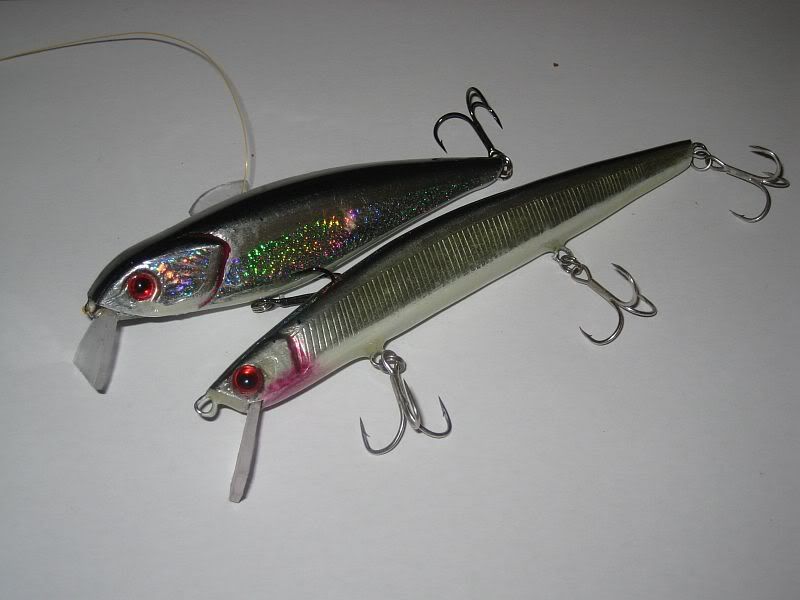
Movable balancer.Better distance on the cast and eliminating wobble when airborne/casting.The ball will move forward as the lure tip forward when retrieved,due to the lip resistance. The ball locked in the grove for a stable swim.
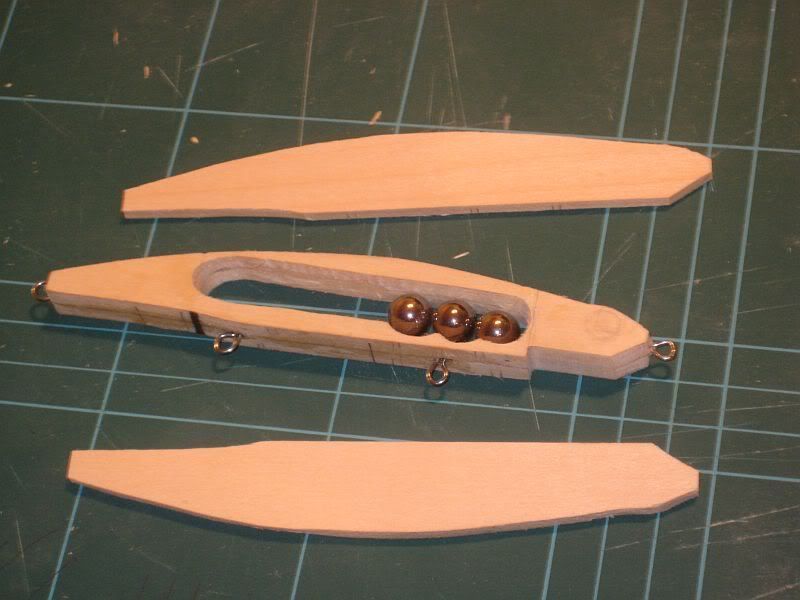
Made from 4 piece of basswood strip(i found out that they are a bit better than balsa)Through wire construction.

Shaping.
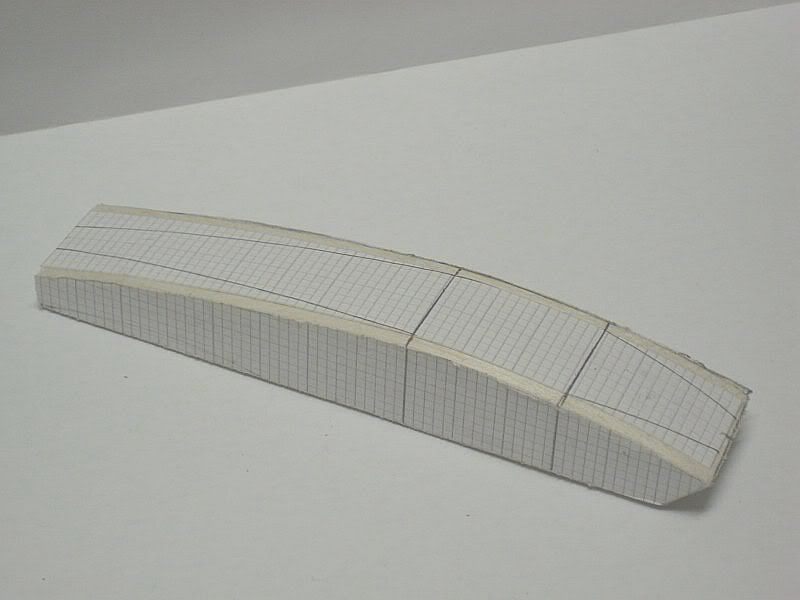
Shaping.
Shaping.
Made from 4 piece of basswood strip(i found out that they are a bit better than balsa)Through wire construction.
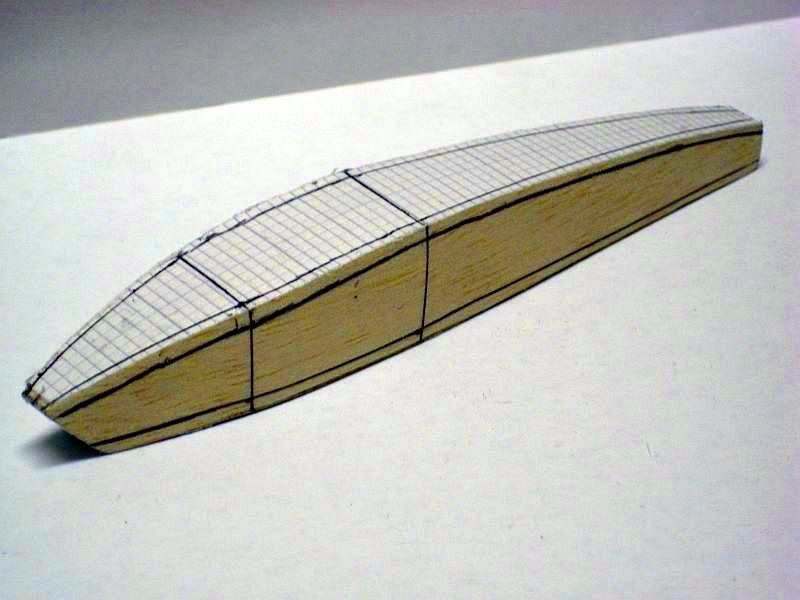
Shaping.
Shaping.
Shaping.
Wed Feb 06, 2008 8:47 pm
Very cool joe, looks very slick :) :) going to get the stuff tomorrow so will put up some of my first efforts.
Thu Feb 07, 2008 9:07 pm
Right joe I got some basswood blocks there are all I could get they are about 5 inches long should I cut it into two smaller pieces glue them temporiarly to get the uniform shape? Like this guy http://translate.google.com/translate?h ... 6%26sa%3DN
The blocks I got are a bit big but I'll be able to make them a bit smaller. Have to get a bit more stuff before I can start. :)
The blocks I got are a bit big but I'll be able to make them a bit smaller. Have to get a bit more stuff before I can start. :)
Sat Feb 09, 2008 5:06 am
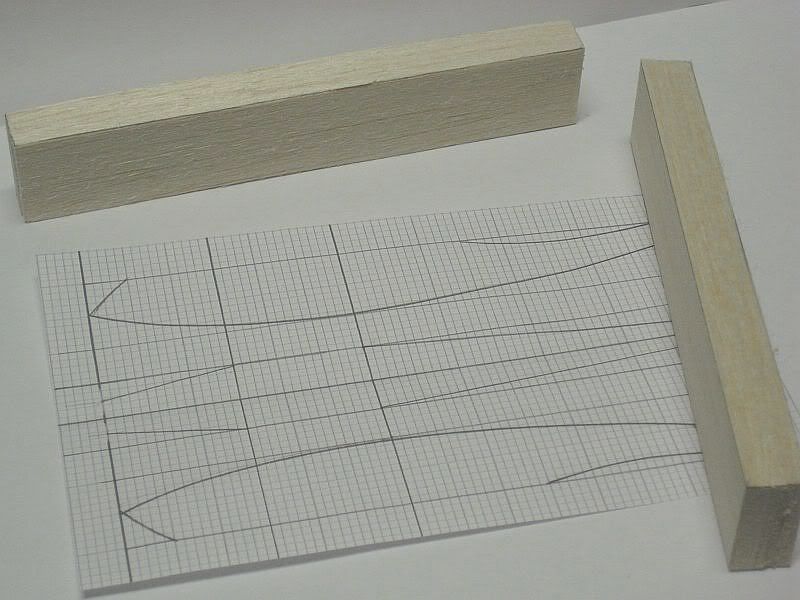
Exactly Jack.....for the 2 piece construction i usually start with 2 piece of block of 1/2 inch thick(its depend on the size of lure that u want to build.)I use double sided tape to temporarily stick them together.This enough to hold them for cutting and shaping.
Next step i will draw a template of lure then paste them on both side of the block.I cut and sand them.Next i will draw the template of the lure of top/plan view and paste them on top of the block.Use graph paper....u want the lure to be as symmetrical as possible.Cut and sand.Then u can start carving and shaving all the edges.Sand them too....now u have 2 halves of symmetrical side of lure body.After that the hardware,hook hanger and tow eye can be place in between the body.Trace them with pencil or pen and make a groove for them before put them together with epoxies.
Make sure u plan everything before hand.....because later,after the body sealed,u want to test them in water to determine where the place u want to put the weight for ballast so it will be upright in water,float nose up,nose down,vertical float,horizontal float 45 degree float....etc...depend on what kind of bait u want to build.
[url]http://www.sumlures.co.jp/world/us/us_fs.html[/url]
The easiest top water to template.From Sam Yamaoka....the original designer of famous Sammy.Good for walking the dog for bass.Float 45 degree nose up.
Cheeeerrrsss...
Sat Feb 09, 2008 11:34 am
Cheers joe that lookes like a fairly easy one to start off with.
Thanks for the help.
Thanks for the help.
Wed Feb 13, 2008 12:22 am
The template ...
Tue Feb 19, 2008 3:46 am
Tue Feb 19, 2008 2:19 pm
very very professional joe, how much :lol: :lol:
Tue Feb 19, 2008 4:07 pm
:shock: :shock: I thought they were those you wanted to reproduce! :wink:
Tue Feb 19, 2008 7:16 pm
Nah.....cant sell it.....still have a lot to improve and tweak....its just so addictive doing it.....like rod building...once u start it....very hard to stop....lots of guys that start this just to save money on buying lure,but instead they end up spending more to buy the tools such an airbrush etc....etc....
Tue Feb 19, 2008 8:27 pm
Nice one joe. Have to find some balsa wood the basswood is a lot harder to work with. Will put up the pics of my attempt in a while.
Tue Feb 19, 2008 8:43 pm
They look great Joe, I think I might have a go at making one or two myself. Btw where did you get the reflective tape and the eyes?
Tue Feb 19, 2008 9:02 pm
reread all of the posts here. some questions for you joe if you dont mind.
1. am i correct is thinking that you buy the wood in sheets and you put multiple sheets together to get the thickness of the lure you want?
2. do you make your own wire for attaching the hooks?
3. what tools do you use for making them ie jigsaw, planes etc
4. whats the average cost of producing these beauties.... i know its more of a hobby than cost saving but do they work out to be expensive?
thanks
Paul
Tue Feb 19, 2008 9:57 pm
Jack...
yes balsa will be a lot more easier to work with compare to basswood.....but the advantage is basswood is a bit tougher and nice when fine sanded.
Dave...
You can get the eye in South Side Angling, at their fly tying section....the reflector tape i got in leinaham home depot in wall paper section....the reflector is tape on the foil tape. The body is foiled first,then the tape.
paulocallaghan...
Yes....most of them are in 4 pcs sheet.The reason because i need to make a space for movable balancer and some times rattler .The 4 pcs construction make it easier for me to get the symmetrical shape for the body.
The through wire construction i make from a stainless steel.
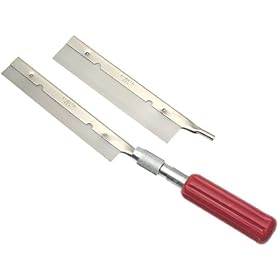
The tools....
and sand paper....
Honestly the cost of one lure is cheap.....i strip of bass wood 1/8"x1"x24" is euro 3.....that stip can be use to make a few lure depend on what size of lure.....wire....euro 1 per meter.....epoxies for coating.....euro 20,354ml....can serve u a lots of lure.....fast curing epoxies....euro 8....etc....etc..thats only from me...a hobbyist ,small scale....i bet its gonna be cheaper for big scale production....i would say maybe euro 5 the cost for the material per lure....
....its just that when u got started from scratch with 0...theres a lot of stuff that u need to buy...lets say u re hooked....then u start looking for a better tool so u can produce them more efficiently......less time per lure...


A long the way you will come to the phase where u start to become creative....everywhere u go(even when shopping with wife in women dept)u will start to look around on stuff and try to think of anything of the stuff that u can use on ur lure.....
But most of custom lure are expensive because of their workmanship....the action.....the designer spend a lot of time in RnD with frustration to get it right....to get it swim right....
http://www.lure-fly.com/vagabond/
yes balsa will be a lot more easier to work with compare to basswood.....but the advantage is basswood is a bit tougher and nice when fine sanded.
Dave...
You can get the eye in South Side Angling, at their fly tying section....the reflector tape i got in leinaham home depot in wall paper section....the reflector is tape on the foil tape. The body is foiled first,then the tape.
paulocallaghan...
Yes....most of them are in 4 pcs sheet.The reason because i need to make a space for movable balancer and some times rattler .The 4 pcs construction make it easier for me to get the symmetrical shape for the body.
The through wire construction i make from a stainless steel.
The tools....
and sand paper....
Honestly the cost of one lure is cheap.....i strip of bass wood 1/8"x1"x24" is euro 3.....that stip can be use to make a few lure depend on what size of lure.....wire....euro 1 per meter.....epoxies for coating.....euro 20,354ml....can serve u a lots of lure.....fast curing epoxies....euro 8....etc....etc..thats only from me...a hobbyist ,small scale....i bet its gonna be cheaper for big scale production....i would say maybe euro 5 the cost for the material per lure....
....its just that when u got started from scratch with 0...theres a lot of stuff that u need to buy...lets say u re hooked....then u start looking for a better tool so u can produce them more efficiently......less time per lure...
A long the way you will come to the phase where u start to become creative....everywhere u go(even when shopping with wife in women dept)u will start to look around on stuff and try to think of anything of the stuff that u can use on ur lure.....
But most of custom lure are expensive because of their workmanship....the action.....the designer spend a lot of time in RnD with frustration to get it right....to get it swim right....
http://www.lure-fly.com/vagabond/
Tue Feb 19, 2008 10:48 pm
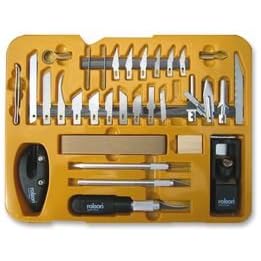
That carving kit looks handy, All I used was a sharp knife a stanley blade and some sandpaper  .
.
Here is my attempt its a bit rough and need to be smoothed out a good bit but im fairly happy with the general shape. Though the middle loop for the hook is too big.

Here is my attempt its a bit rough and need to be smoothed out a good bit but im fairly happy with the general shape. Though the middle loop for the hook is too big.
Tue Feb 19, 2008 11:22 pm
Its not that bad for the 1st attempt jack.....if i still got my 1st lure photo,i am sure u'll be laughing at it....
U dont need that carving set....just the fine saw the one that can be get from model shop.For the carving blade...just get the x-acto knife....u can get them from any stationary shop....

Other than that....a rotary tool or dremel tool will make life easier....for drilling eye socket....cutting lip/bib....etc....i just get a cheap one from maplin....

U dont need that carving set....just the fine saw the one that can be get from model shop.For the carving blade...just get the x-acto knife....u can get them from any stationary shop....
Other than that....a rotary tool or dremel tool will make life easier....for drilling eye socket....cutting lip/bib....etc....i just get a cheap one from maplin....
Tue Feb 19, 2008 11:30 pm
Cheers joe have to get some of those, dremmel tool looks very handy.
Sat Feb 23, 2008 5:46 pm
Roughly a few templates....its just to give u the rough idea on weight placement and lip/bib size and angle.....yet the weight placement,bib size and angle still can be tweak and test to get a better balance and swimming action....
http://pecalista.rulez.org/FaHal2/JapanFaHal.htm
http://pecalista.rulez.org/FaHal2/JapanFaHal.htm
Sat Feb 23, 2008 8:04 pm
Thats very helpful Joe what is the lure being dipped into? Nice shape to that lure that will be my next attempt.
Sun Feb 24, 2008 7:57 pm
Hi jack...not sure what the guys use for coating and waterproofing his lure....look like cellulose base coat/glue???I use slow setting epoxies for waterproofing and coating.Devcon 2/3 ton in an hour setting will do other than that i use Z-Poxy finishing resin epoxies.